Grouting is the final and crucial step in any tile installation. Done right, it seals the deal—literally—by locking tiles in place, preventing moisture intrusion, and giving your floor a finished look. Done wrong, and even the best tile job can end up looking sloppy or fail prematurely. This guide breaks down what you need to know before, during, and after grouting your floor tile.
1. Choose the Right Grout
There are three main types of grout: sanded, unsanded, and epoxy.
- Sanded grout is ideal for tile joints wider than 1/8 inch. It's durable, shrink-resistant, and commonly used for floor tiles.
- Unsanded grout is used for narrower joints, typically found in wall or decorative tile installations.
- Epoxy grout is chemical-resistant, waterproof, and extremely durable perfect for commercial kitchens or areas that see heavy moisture.
For most residential floor tile installations, sanded grout works well. But if you're using natural stone or glossy finishes, consult your tile or floor tile supplier to avoid surface scratches.
2. Prep the Surface
Before grouting, make sure your tile is completely set and the mortar is dry. This usually takes at least 24 hours. Clean the surface thoroughly dust, debris, or leftover mortar can compromise the grout bond. Pay attention to the grout lines and remove any spacers that may still be in place.
Also, it’s a good idea to seal porous tiles, like natural stone or unglazed ceramic, before grouting. This prevents staining from the grout pigment and makes cleanup easier.
3. Mix Grout Properly
Follow the manufacturer's instructions to mix the grout. Use a clean bucket, water, and a margin trowel or paddle mixer. The goal is a peanut butter-like consistency thick but spreadable. Let it sit (or "slake") for 5–10 minutes after mixing, then remix without adding water.
Mix in small batches to avoid waste and prevent the grout from drying out before application. If you're using pre-mixed grout, stir it thoroughly before use.
4. Apply the Grout
Using a rubber float, apply grout at a 45-degree angle to the tile joints. Press firmly to ensure the grout gets deep into the joints. Work in small sections—around 3x3 feet—so the grout doesn’t begin drying before you're ready to clean it.
Hold the float diagonally across the tiles to wipe away excess grout while still filling the lines evenly. Don’t worry about getting grout on the tile surface; that will be cleaned off later.
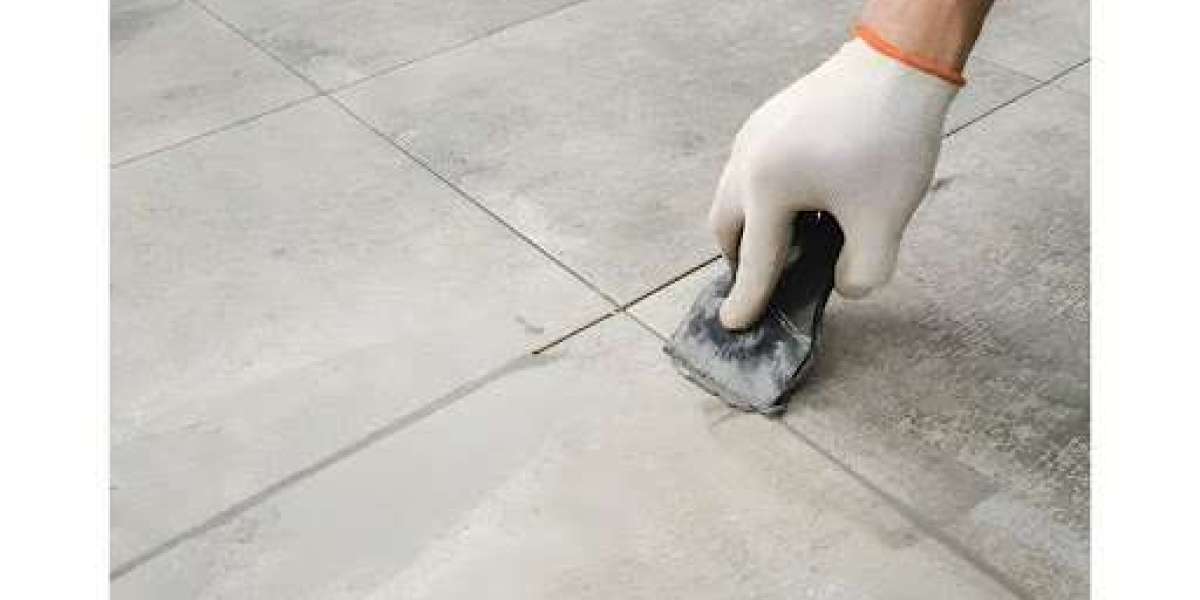
5. Clean Excess Grout
Wait 10–15 minutes after application, then start cleaning the tile surface with a damp sponge. Use light, circular motions to avoid pulling grout from the joints. Rinse the sponge frequently and change water as needed.
Be patient—it often takes several passes to fully clean the tile surface. Avoid using too much water, which can weaken the grout or cause uneven coloring.
After an hour or so, a hazy film will appear on the tiles. Buff it off with a microfiber cloth or a cheesecloth. If haze persists, a commercial grout haze remover may be necessary.
6. Cure and Seal the Grout
Allow the grout to cure for at least 24–72 hours, depending on the product. Avoid foot traffic and keep the area dry. Proper curing ensures maximum strength and prevents cracking.
Once cured, apply a grout sealer, especially for sanded or cement-based grouts. This helps protect against stains and moisture. Use a sponge or applicator bottle and follow product instructions. Be careful not to get sealer on the tiles, particularly if they have a matte or porous finish.
7. Inspect and Touch Up
After sealing, inspect your work. Look for cracks, holes, or inconsistent lines. Touch up with fresh grout as needed and re-clean the area. Small imperfections are normal, but correcting them early will prevent long-term issues.
Also, it’s smart to keep a small batch of leftover grout in a sealed container for future touch-ups. Label it with the color and brand for reference.
8. Maintenance Tips
Grout is porous and can absorb dirt over time. Sweep and mop your floor regularly with a pH-neutral cleaner to prevent grime buildup. Avoid acidic or bleach-based cleaners, as they can erode the grout.
Reapply sealer every 1–2 years to maintain protection, especially in high-traffic areas like kitchens or hallways.
9. Common Mistakes to Avoid
- Skipping the slake time: Not allowing grout to sit after mixing can result in weaker grout.
- Using too much water during cleanup: This can wash out pigments and weaken the grout.
- Not sealing grout: Leaving grout unsealed in wet or high-traffic areas makes it vulnerable to mold, mildew, and staining.
- Ignoring manufacturer’s instructions: Whether it’s grout or tile, each product is different. Don’t assume all grouts behave the same.
10. Know When to Call a Pro
While DIY grouting is totally doable, large spaces, natural stone, or epoxy grout may be better left to professionals. A good installer can save you time, reduce waste, and deliver flawless results. Many homeowners opt to do the prep and let the pros handle the finishing.
Some ceramic wall tiles manufacturers offer instructional videos or even certified installers, which can be a helpful resource if you’re unsure about doing it yourself.
Conclusion
Grouting may not be the most glamorous part of tile work, but it’s one of the most important. With the right tools, materials, and a little patience, you can achieve a clean, polished look that stands the test of time. Whether you're redoing a bathroom floor or laying tile in a kitchen, following these tips will make the job smoother and help you avoid costly mistakes.
If in doubt, don’t hesitate to ask your floor tile supplier for recommendations on products and techniques. A little guidance goes a long way in getting the job done right.